LLMForEverybody
当Claude桌面助手自动整理会议纪要、Midjourney插件实时读取本地设计稿时,你是否好奇这些AI工具如何突破”数字牢笼”实现人机协作?
这背后离不开一项革命性协议——模型上下文协议(Model Context Protocol,MCP)。作为AI领域的”万能适配器”,MCP正在重塑大模型与现实世界的连接方式。
本文主要分三个部分:
第一部分,简单介绍一下mcp的基本概念
第二部分,手把手教学从”使用现成工具”到”开发专属MCP服务器”
第三部分,通过动态时序图揭秘Anthropic等顶尖实验室的协议设计哲学,看懂下一代AI交互标准
一、基础概念
MCP 是由 Anthropic 于 2024 年推出的开放协议,旨在标准化大型语言模型(LLM)与外部数据源、工具之间的通信,解决传统 AI 因数据孤岛限制而无法充分交互的问题。它类似于 AI 领域的“通用插头”,允许模型通过统一接口安全访问本地或远程资源(如数据库、API、文件系统等),实现动态获取上下文信息并执行操作.
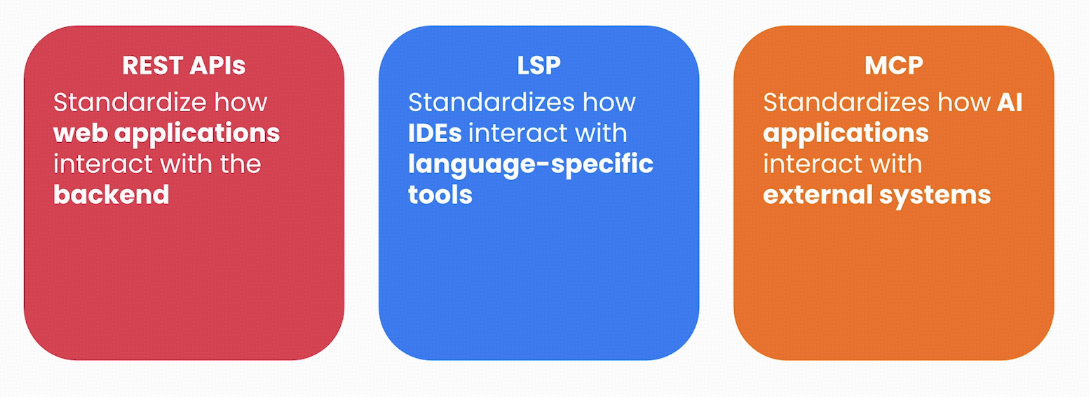
MCP 采用 客户端-服务器架构,包含以下核心组件:
- MCP 主机(Host):如 Claude Desktop 或 Cursor IDE,提供用户交互界面。
- MCP 客户端(Client):嵌入在主机内,负责协议解析与通信。
- MCP 服务器(Server):轻量级服务节点,提供三类功能:
- 资源(Resources):静态数据(文件、数据库记录)。
- 工具(Tools):可执行函数(API 调用、数据分析)。
- 提示(Prompts):预定义交互模板
注:mcp的基本概念不是本文关注的重点,但为了不失完备性,还是放了这个章节,如果你想知道MCP的基础概念,建议阅读下面两篇文章:
https://mp.weixin.qq.com/s/5XbO76qCCYrRVaYjTd3BIA
https://mp.weixin.qq.com/s/G2V5VmsjMWs08rUAE8zCuQ
二、使用MCP的方法
2.0 MCP Server
已发布的MCP server
目前,公开发布MCP server非常多,也逐渐形成了多个社区:
https://mcpmarket.com/
https://smithery.ai/
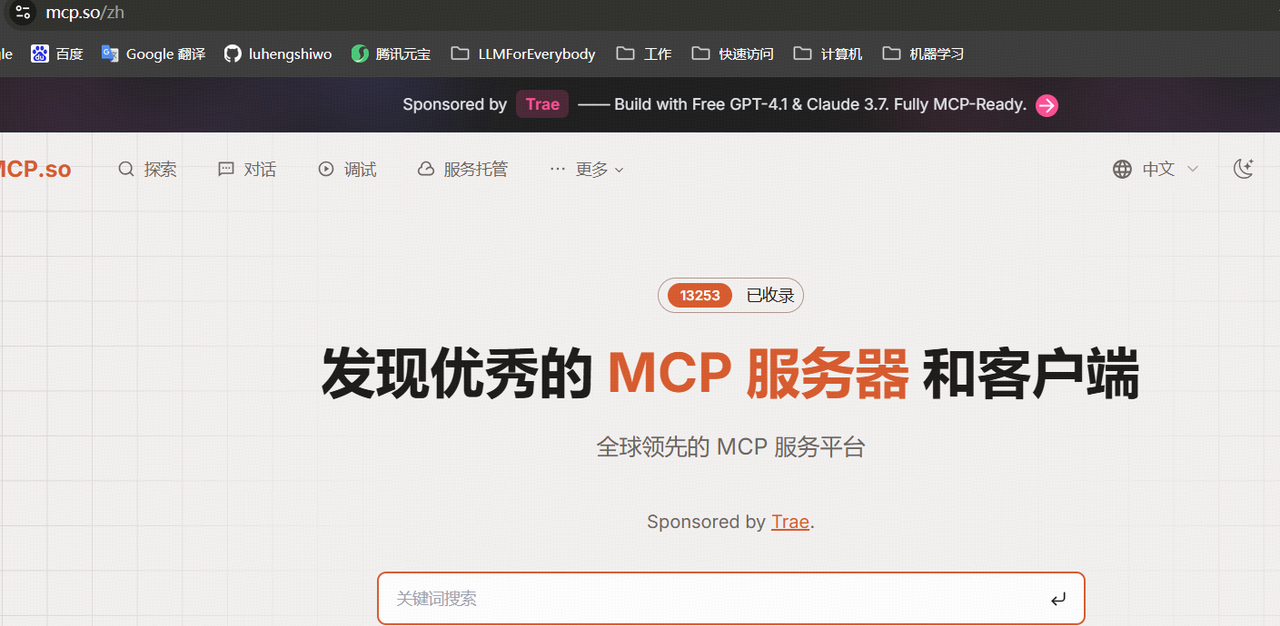
https://mcp.so/
https://modelscope.cn/mcp
https://actions.zapier.com/mcp
开发者可以很方便的在上述的网站中查找对自己有用的MCP 服务;
下面,我们以mcp.so为例,教大家如何准备自己的MCP 服务。
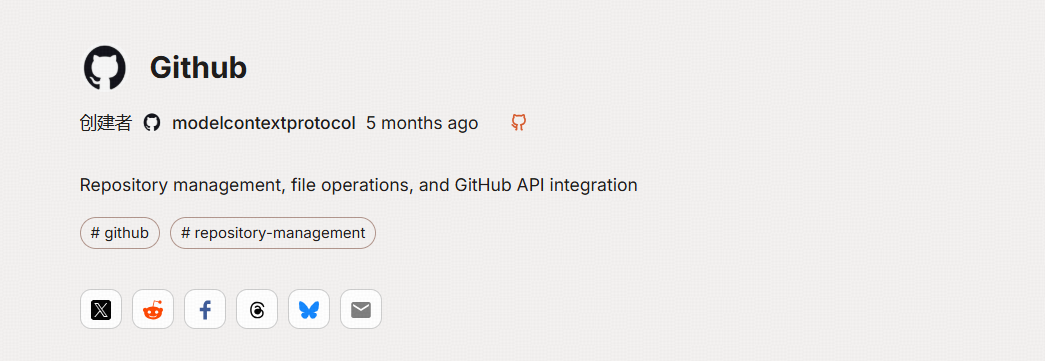
我们可以看到github这个服务器配置为:
{
  "mcpServers": {
    "github": {
      "command": "npx",
      "args": [
        "-y",
        "@modelcontextprotocol/server-github"
      ],
      "env": {
        "GITHUB_PERSONAL_ACCESS_TOKEN": "<YOUR_TOKEN>"
      }
    }
  }
}
这边,就约定了这个github mcp 服务的启动方式了。如果我们需要,就把这段配置拷贝,放到我们选择的某个host里即可。如果你现在不知道怎么配置,没关系,接下来的章节我会手把手的教你。
自建server
我们也可以自己创建一个mcp server,这一部分可以直接参考anthropic的官方示例:https://modelcontextprotocol.io/quickstart/server
此时,你就有了一个自己的服务器,配置为:
{
    "mcpServers": {
        "weather": {
            "command": "uv",
            "args": [
                "--directory",
                "/ABSOLUTE/PATH/TO/PARENT/FOLDER/weather",
                "run",
                "weather.py"
            ]
        }
    }
}
接下来,我们要做的就是把这些个server,配置到我们的host里面。在本文里,我分别选用了cherry studio客户端,LangGraph 开发框架和Dify这样的LLMOps平台,介绍如何将MCP Server配置进去。
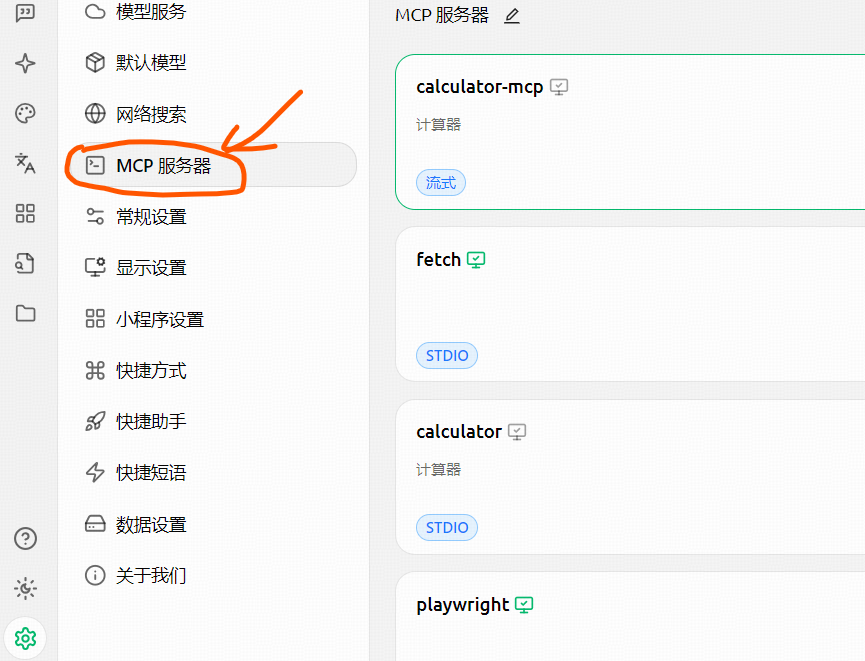
2.1 Cherry studio使用MCP Server
如何安装cherry studio不在本文讨论范围之内,安装完毕后,可以找到设置里的MCP 服务器,将上文中的配置拷贝进去即可。
2.2 LangGraph使用MCP Server
在Langgraph里面使用MCP 服务也很简单,参考官方示例:https://langchain-ai.github.io/langgraph/agents/mcp/#use-mcp-tools,只需要在代码中将上文中的配置拷贝进去即可
from langchain_mcp_adapters.client import MultiServerMCPClient
from langgraph.prebuilt import create_react_agent

client = MultiServerMCPClient(
    {
        "math": {
            "command": "python",
            # Replace with absolute path to your math_server.py file
            "args": ["/path/to/math_server.py"],
            "transport": "stdio",
        },
        "weather": {
            # Ensure your start your weather server on port 8000
            "url": "http://localhost:8000/mcp",
            "transport": "streamable_http",
        }
    }
)
## 在上面的方法里拷贝上文中的配置

tools = await client.get_tools()
agent = create_react_agent(
    "anthropic:claude-3-7-sonnet-latest",
    tools
)
math_response = await agent.ainvoke(
    {"messages": [{"role": "user", "content": "what's (3 + 5) x 12?"}]}
)
weather_response = await agent.ainvoke(
    {"messages": [{"role": "user", "content": "what is the weather in nyc?"}]}
)
2.3 Dify使用MCP Server
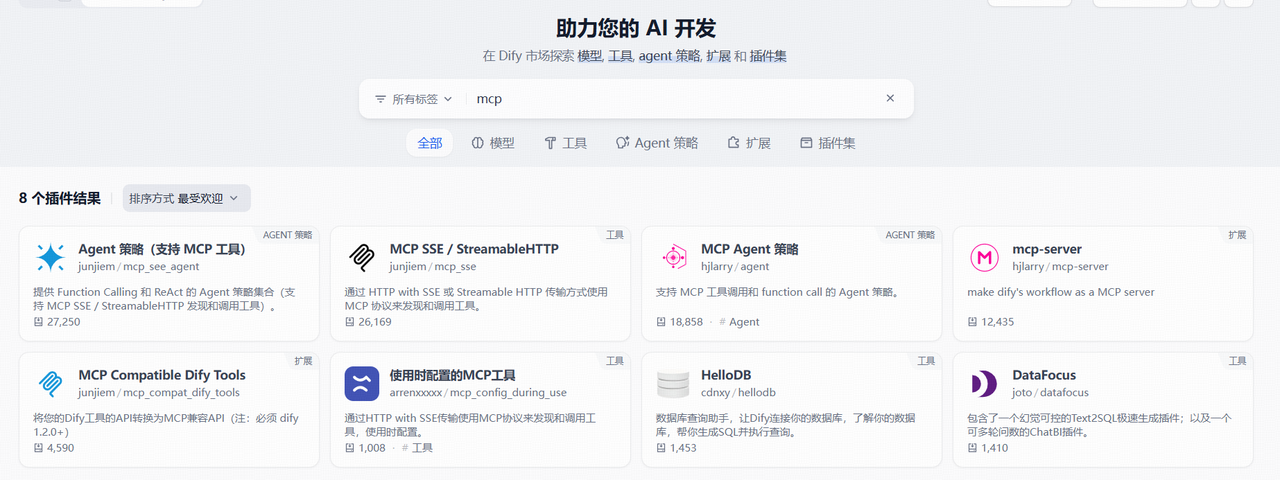
在Dify中,暂时只支持SSE的MCP 服务,首先确保你的dify是1.2.0以上的版本,在插件市场搜索mcp,选择Agent策略(支持MCP 工具),并安装。注:其它的插件也可以,可以自行测试。
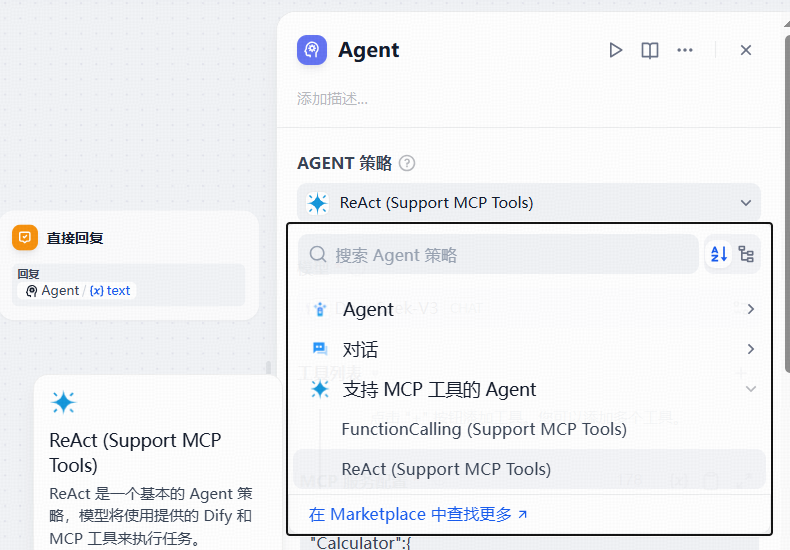
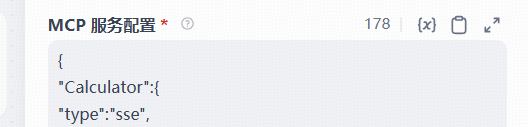
在Agent里选择ReAct(Support MCP Tool),并在mcp服务配置里面,将上文的配置拷贝进去即可。
三、MCP的运行原理
想要弄懂MCP到底做了什么,我们可以用时序图来分别看下在server注册和用户使用时,数据的交互是怎样的。
3.1 server注册时序图
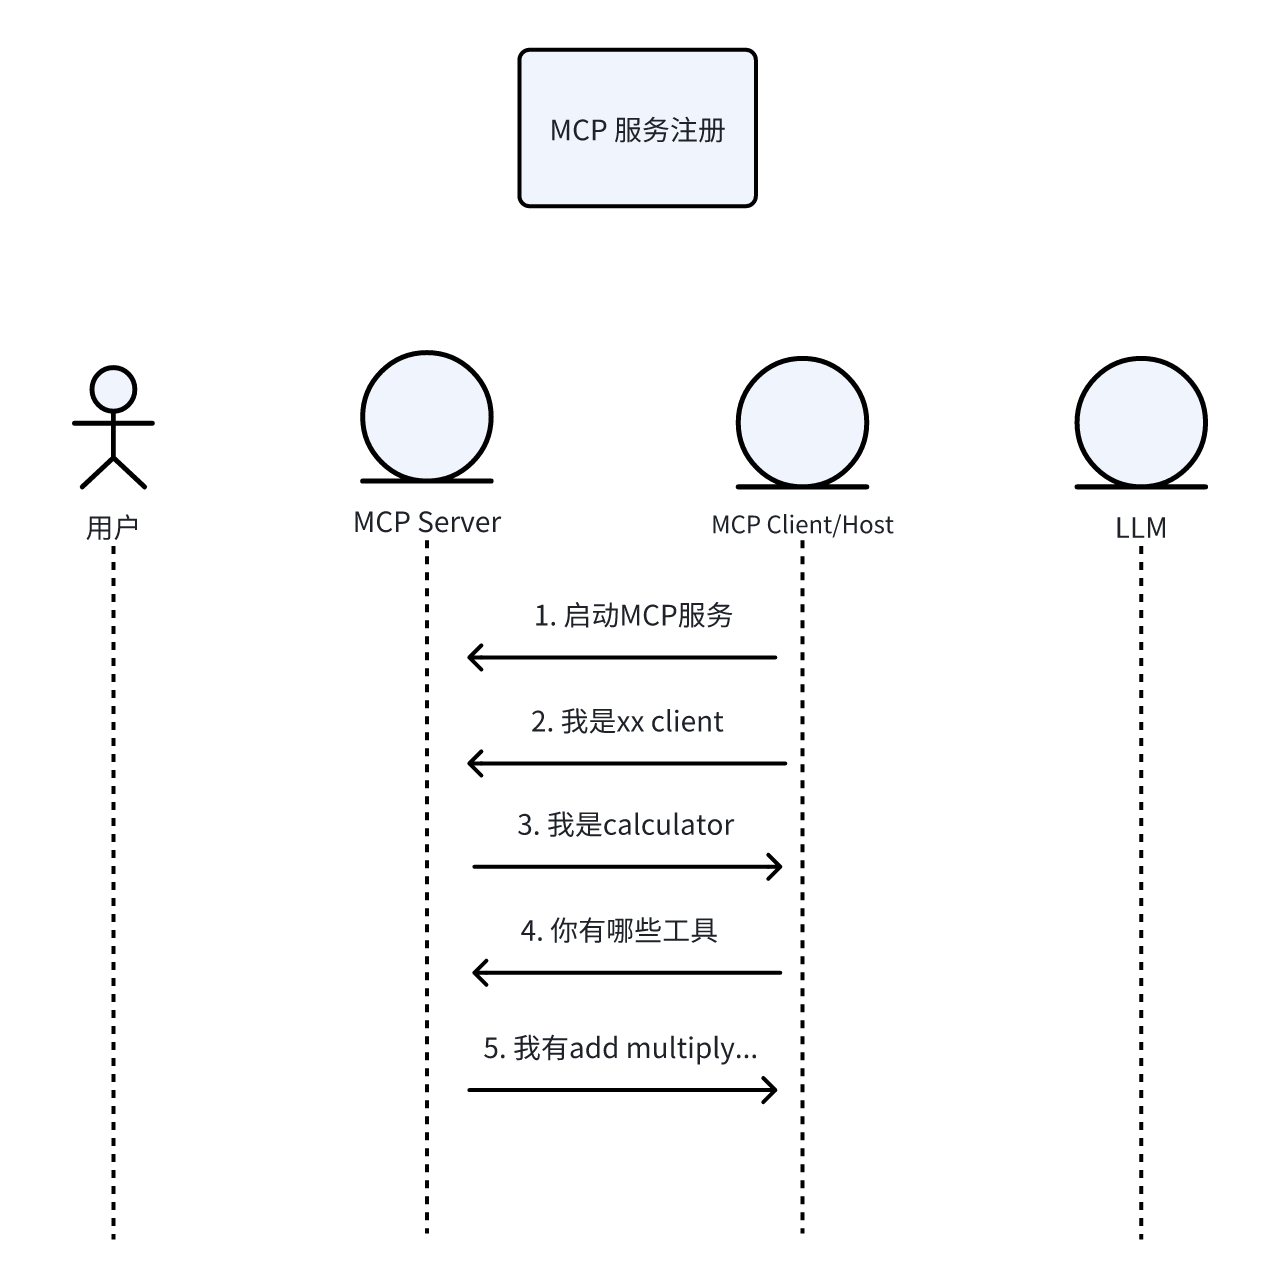
下述步骤的序号和时序图一一对应
以cherry studio 为例,当我们在上面注册了自己写的calculator这个mcp 服务,在注册成功之前,server 和 client其实已经交互了多轮:
- 首先,客户端会启动mcp server,我们的mcp服务是stdio方式,所以这一步相当于cherry studio运行了如下的命令:
uv run calculator.py
- Client 向 server 传输信息:我是xx 客户端
{"method":"initialize","params":{"protocolVersion":"2024-11-05","capabilities":{},"clientInfo":{"name":"Cline","version":"3.12.3"}},"jsonrpc":"2.0","id":0}
- Server 会回复:我是calculator 服务
{"jsonrpc":"2.0","id":0,"result":{"protocolVersion":"2024-11-05","capabilities":{"experimental":{},"prompts":{"listChanged":false},"resources":{"subscribe":false,"listChanged":false},"tools":{"listChanged":false}},"serverInfo":{"name":"CalculatorService","version":"1.8.1"}}}
- Client 会初始化该服务,并接着询问 server 的有哪些工具
{"method":"notifications/initialized","jsonrpc":"2.0"}
{"method":"tools/list","jsonrpc":"2.0","id":1}
- 服务会回复服务中工具的信息:包含工具的描述,工具的出入参,
{
        "jsonrpc": "2.0",
        "id": 1,
        "result": {
                "tools": [{
                        "name": "add",
                        "description": "执行浮点数加法运算",
                        "inputSchema": {
                                "properties": {
                                        "a": {
                                                "title": "A",
                                                "type": "number"
                                        },
                                        "b": {
                                                "title": "B",
                                                "type": "number"
                                        }
                                },
                                "required": ["a", "b"],
                                "title": "addArguments",
                                "type": "object"
                        }
                },
                {
                        "name": "subtract",
                        "description": "执行浮点数减法运算",
                        "inputSchema": {
                                "properties": {
                                        "a": {
                                                "title": "A",
                                                "type": "number"
                                        },
                                        "b": {
                                                "title": "B",
                                                "type": "number"
                                        }
                                },
                                "required": ["a", "b"],
                                "title": "subtractArguments",
                                "type": "object"
                        }
                },
                {
                        "name": "multiply",
                        "description": "执行浮点数乘法运算",
                        "inputSchema": {
                                "properties": {
                                        "a": {
                                                "title": "A",
                                                "type": "number"
                                        },
                                        "b": {
                                                "title": "B",
                                                "type": "number"
                                        }
                                },
                                "required": ["a", "b"],
                                "title": "multiplyArguments",
                                "type": "object"
                        }
                },
                {
                        "name": "divide",
                        "description": "执行浮点数除法运算\n    Args:\n        b: 除数(必须非零)\n    ",
                        "inputSchema": {
                                "properties": {
                                        "a": {
                                                "title": "A",
                                                "type": "number"
                                        },
                                        "b": {
                                                "title": "B",
                                                "type": "number"
                                        }
                                },
                                "required": ["a", "b"],
                                "title": "divideArguments",
                                "type": "object"
                        }
                },
                {
                        "name": "power",
                        "description": "计算幂运算",
                        "inputSchema": {
                                "properties": {
                                        "base": {
                                                "title": "Base",
                                                "type": "number"
                                        },
                                        "exponent": {
                                                "title": "Exponent",
                                                "type": "number"
                                        }
                                },
                                "required": ["base", "exponent"],
                                "title": "powerArguments",
                                "type": "object"
                        }
                },
                {
                        "name": "sqrt",
                        "description": "计算平方根",
                        "inputSchema": {
                                "properties": {
                                        "number": {
                                                "title": "Number",
                                                "type": "number"
                                        }
                                },
                                "required": ["number"],
                                "title": "sqrtArguments",
                                "type": "object"
                        }
                },
                {
                        "name": "factorial",
                        "description": "计算整数阶乘",
                        "inputSchema": {
                                "properties": {
                                        "n": {
                                                "title": "N",
                                                "type": "integer"
                                        }
                                },
                                "required": ["n"],
                                "title": "factorialArguments",
                                "type": "object"
                        }
                }]
        }
}
此时,一个server的注册就完成了。
3.2 用户使用时序图
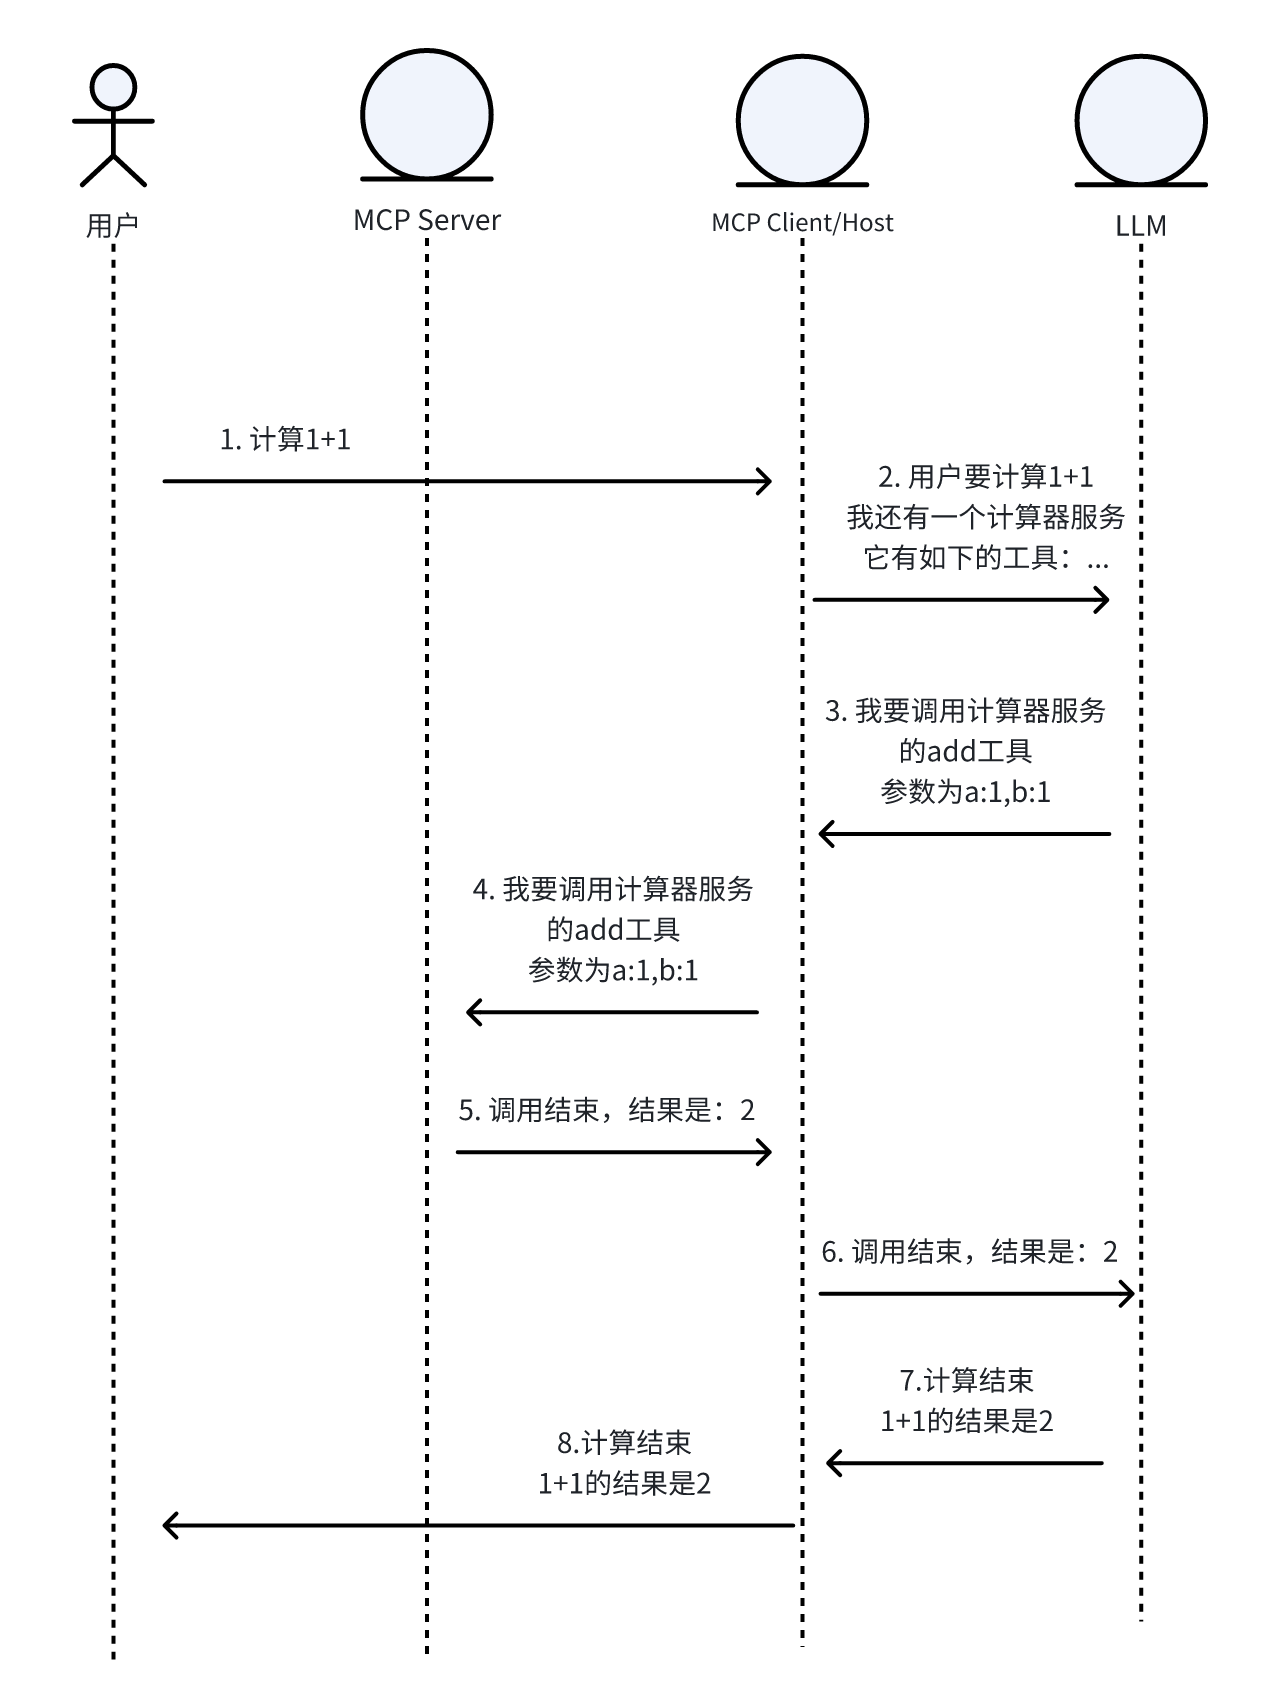
下述步骤的序号和时序图一一对应
-
用户在host上提交请求,计算1+1,比如,用户在cherry studio上输入计算1+1,并回车
-
Cherry studio 会将该请求,连同我们配置的MCP server的信息,以prompt/function call的形式,传输给LLM,该prompt约定了如果需要调用mcp server,该使用的格式
-
大模型经过思考,发现需要调用计算器这个MCP server的add 工具,并根据约定,按照MCP范式,给出调用的方法,在这边是如下的返回
{"method":"tools/call","params":{"name":"add","arguments":{"a":1.0,"b":1.0}},"jsonrpc":"2.0","id":4}
-
Client 转发并调用 server
-
Server返回结果
{"jsonrpc":"2.0","id":4,"result":{"content":[{"type":"text","text":"2.0"}],"isError":false}}
-
Client转发给(携带历史信息)LLM
-
大模型获取结果并进行总结,将最终的结果返回给client
-
client拿到结果,并发送给用户
3.3 模型上下文协议
对于模型上下文协议这个名词,我们要注意的是该协议只规定了client和server之间的交互协议(方式),没有规定client和LLM之间如何交互,不同的的client会实现自己的方式。 对于大模型来说,上下文就是环境,模型的上下文,就是模型的所处的环境是什么,即模型可以拿到的工具是什么。
MCP本质上就是让模型感知外部环境的协议。
参考
[1]https://mp.weixin.qq.com/s/5XbO76qCCYrRVaYjTd3BIA
https://mp.weixin.qq.com/s/G2V5VmsjMWs08rUAE8zCuQ
https://mcpmarket.com/
https://smithery.ai/
https://mcp.so/
https://modelscope.cn/mcp
https://actions.zapier.com/mcp
https://modelcontextprotocol.io/quickstart/server
https://langchain-ai.github.io/langgraph/agents/mcp/#use-mcp-tools
https://www.deeplearning.ai/short-courses/mcp-build-rich-context-ai-apps-with-anthropic/?utm_campaign=anthropicC2-launch&utm_medium=headband&utm_source=deeplearning-ai